How to fit a backpack
When it comes to hiking backpacks, fit is everything. Certainly, a hiking backpack should be lightweight, durable, have convenient pockets and compartments, but an ill-fitting or ill-fitted backpack will never be comfortable on trails. A well-fitting backpack makes the heavy load feel much lighter while a poorly fitting backpack is uncomfortable even when you are carrying a light load. In the following we will explain how to properly fit a backpack for hiking and backpacking.
However, the most important thing is to buy a backpack that fits your body well in the first place. Therefore, the first section is about making sure that the backpack fits your torso length while the other sections explain how to correctly adjust the suspension system, shoulder straps, hip belt, sternum strap, load straps etc.
Table of Contents:
- Make sure that you have the right size of the backpack
- Adjust the suspension system
- Adjust the hipbelt
- Adjust the shoulder straps
- Adjust the load straps
- Adjust the sternum strap
- Readjust on trail
Make sure that you have the right size of a backpack
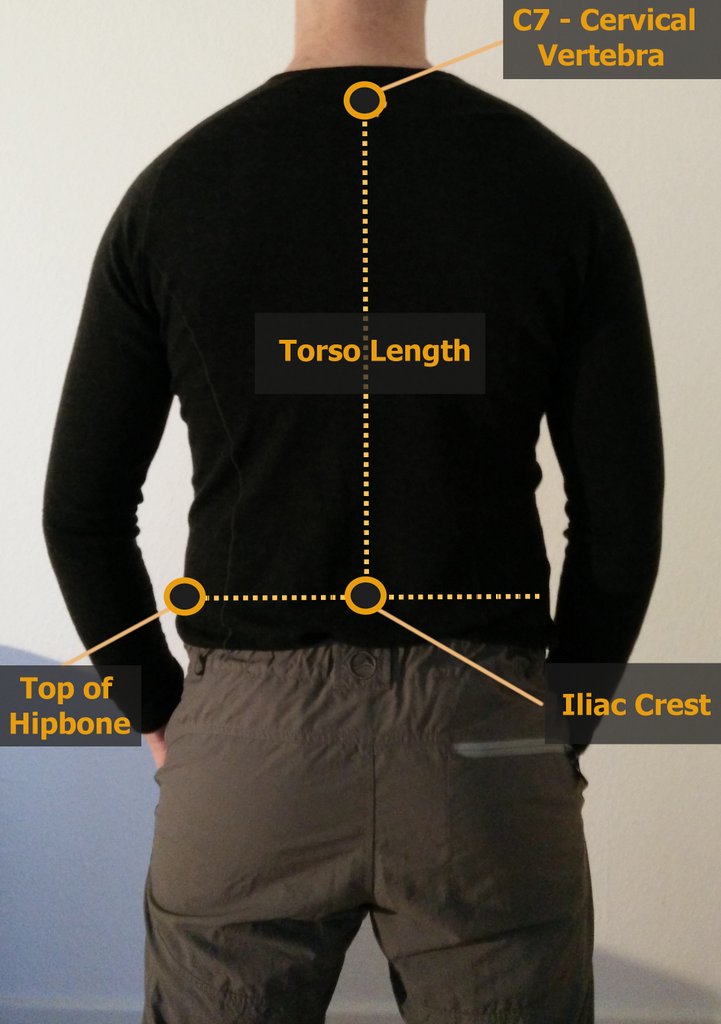
How to fit a backpack – Measure your torso length
Hiking backpacks are typically available in different sizes (small, medium etc.) and have adjustable suspensions to fit a wider range of torso lengths.
Before buying a backpack, measure your torso length and check that it matches the torso range of the backpack you have your eyes on. You will find the torso range of the backpack online (for example on the backpack brand’s official website) or on its tag. You can easily measure your torso length at home.
Your torso length is the distance between the bony bump at the base of your neck where the slope of the shoulders meets the neck (C7 – the seventh cervical vertebra; tilt your head forward to make it easier to find), and down to the top of your hip bones (iliac crest). See the image on the right for better understanding.
Getting the right size of the backpack in terms of torso length is crucial. You will not be able to achieve good fit if the backpack is too big or too small for you.
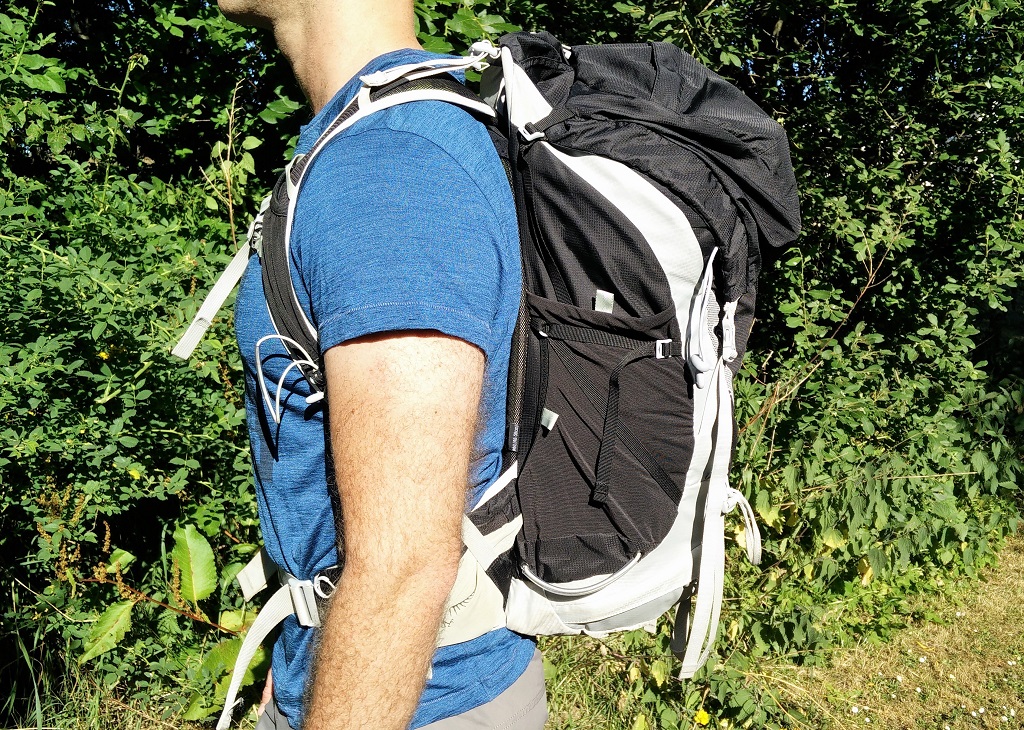
Adjust the suspension system
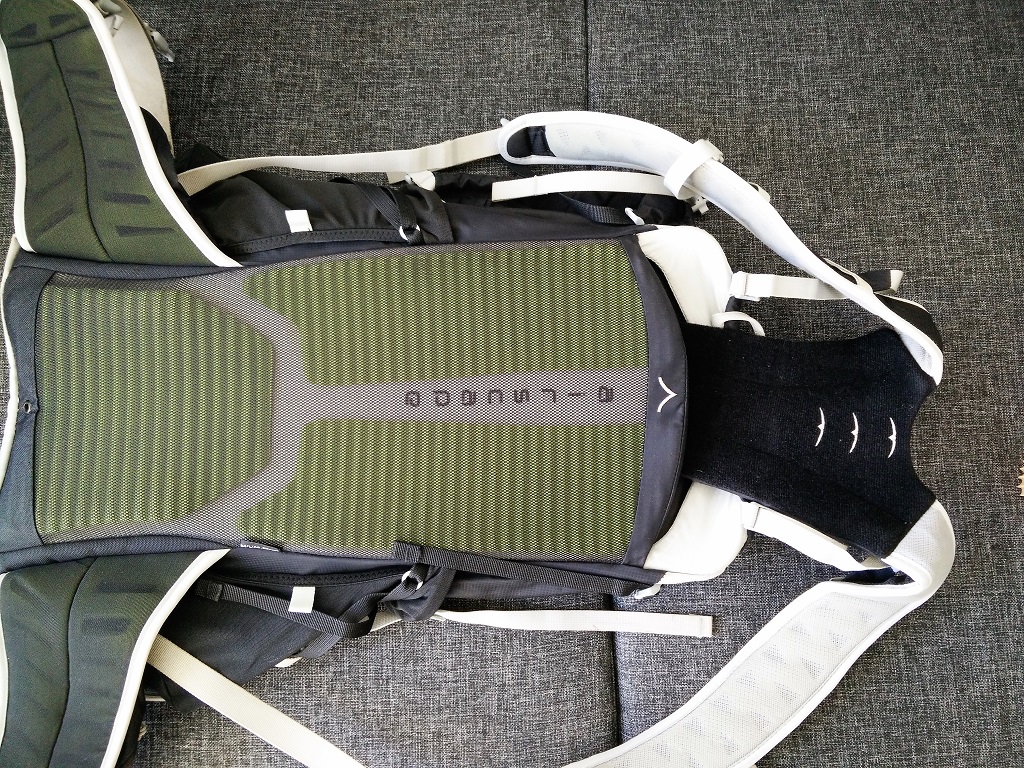
How to fit a backpack – Adjustable suspension system on Osprey Talon
After you measured your torso length, it is time to adjust the backpack’s suspension system.
- Unlock the suspension system and remove the part with the shoulder straps (if required) – different backpacks have different adjustment systems, but usually they are quite intuitive.
- Measure the distance of your torso length plus 1.5 inch (3.5 cm) from the bottom of the backpack’s backpanel up and make a small dot with a marker.
- Lock the adjustable part of the suspension system (the part with shoulder straps) just below the dot you have made earlier.
A correctly adjusted suspension system is crucial for good fit. If you followed the steps above, you now adjusted your backpack so that the hip belt will be centered over your hipbones and the shoulder straps will not come too high or too low. In the 3rd step (Adjust the shoulder straps), we’ll explain how to recheck that the suspension system is adjusted correctly.
Note: Some online guides recommend that the hipbelt should be placed one inch above the hipbones. However, I never felt comfortable wearing the hipbelt so high because it was pressing on my stomach and didn’t hold the backpack’s weight very well. Osprey also states that a properly fitted hipbelt rides centered over the hipbones, but not above the hipbones.
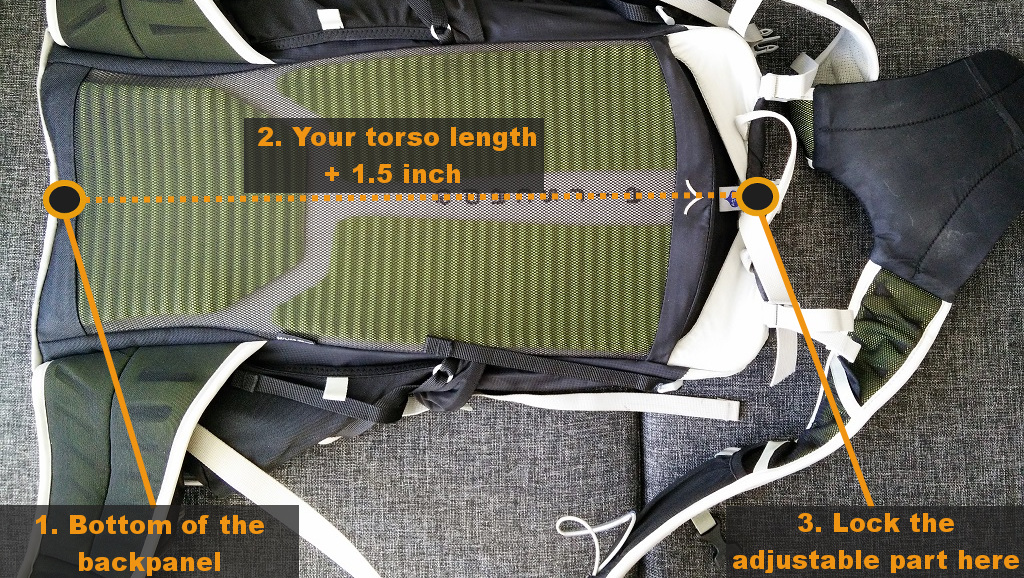
How to fit a backpack – Measure your torso length + 1-5 inch
Adjust the hipbelt
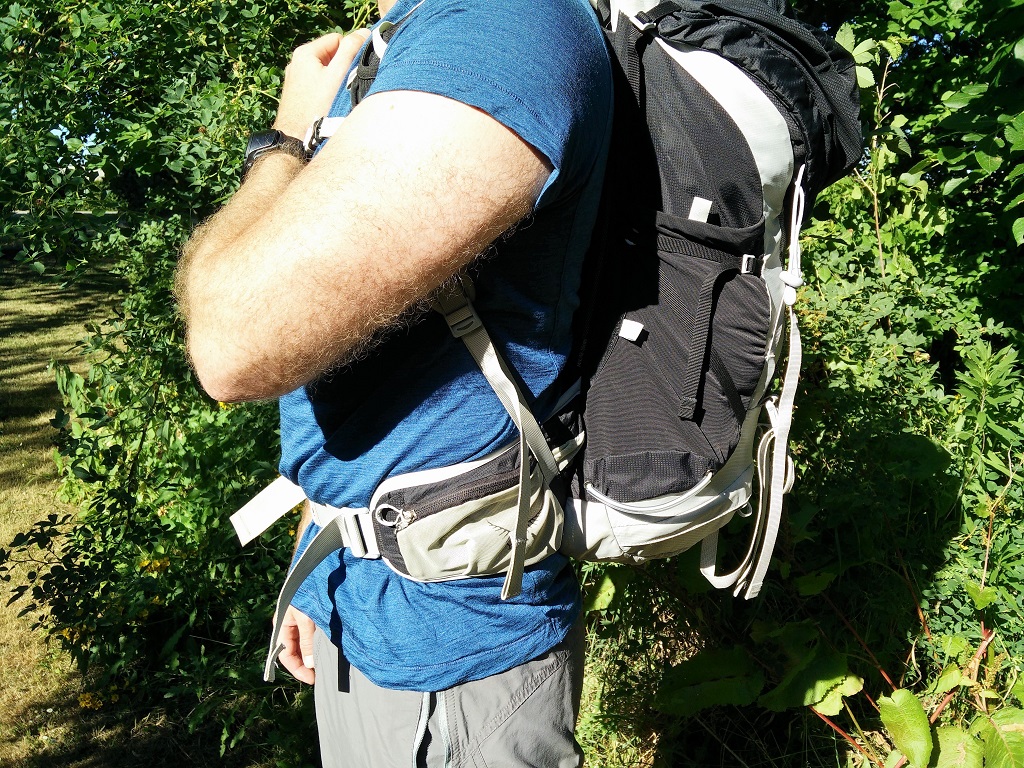
How to fit a backpack – The hipbelt should be centered over your hipbones
After you adjusted the suspension system, it’s time to adjust the hipbelt. For all following steps you should first load the backpack – start with 15 pounds (8 kg) or so.
Put the backpack on and move the hipbelt until it sits centered over your hipbones. If the hipbelt sits too high or too low, tighten or loosen the shoulder straps. When the position of the hipbelt is right, fasten the buckle and tighten it. Don’t tighten the hipbelt too much – it should be snug but not uncomfortable. Now release the shoulder straps a little. When the shoulder straps are released the hipbelt should hold the backpack and the shoulder straps should only touch the front side of your shoulders.
If the hipbelt is adjusted correctly the weight of the backpack gets transferred from the shoulders to the hips (via the hipbelt), which increases your performance as the hips are supported by larger muscle groups than the shoulders.
Adjust the shoulder straps
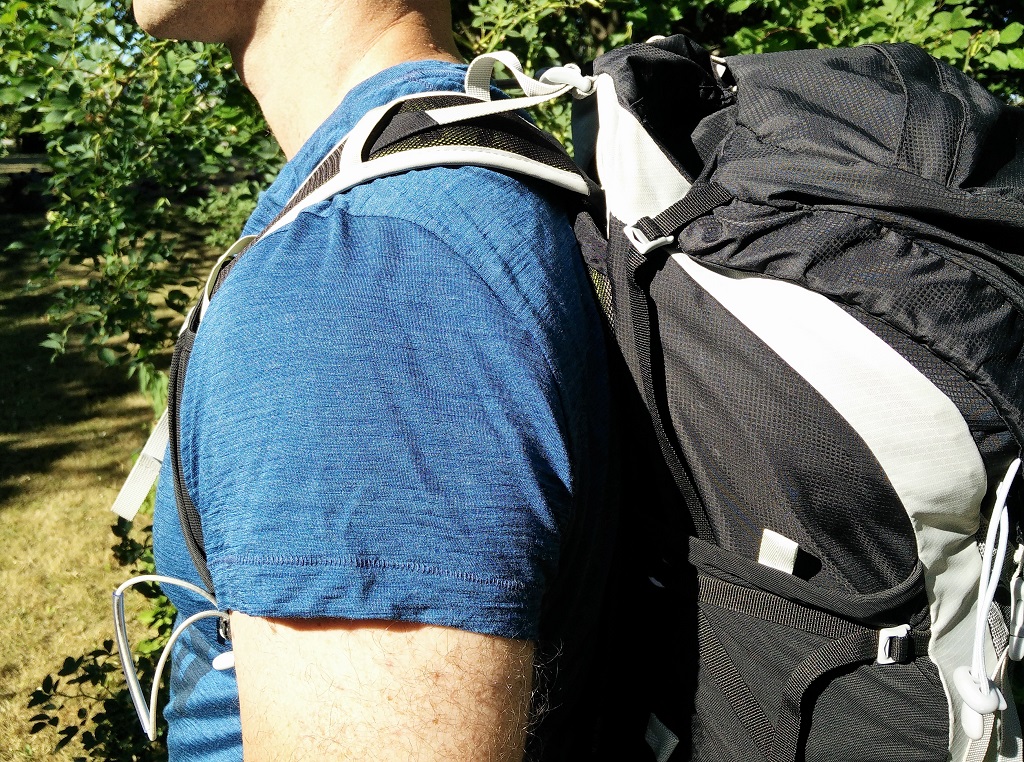
How to fit a backpack – Shoulder straps
Pull the shoulder straps down/back to tighten them. The shoulder straps should fit snugly around your shoulders but the hipbelt should be carrying most of the weight. If you feel that the shoulder straps are carrying most of the weight, your hipbelt adjustment is not correct; it might be too high, too low or not tight enough. This entails unnecessary strain on your shoulder and neck muscles.
After you adjusted the hipbelt and the shoulder straps, it’s time to check that your suspension adjustments from the first step are correct. The shoulder strap anchor points should be one to two inches below the top of your shoulders (see the images below for clarity).
If they are higher than that, the backpack is placed too high on your back, which means that you need to lock the adjustable part of the suspension system (the part with shoulder straps) lower.
If the anchor points are lower, the backpack is placed too low on your back, which means that you need to lock the adjustable part of the suspension system (the part with shoulder straps) higher.
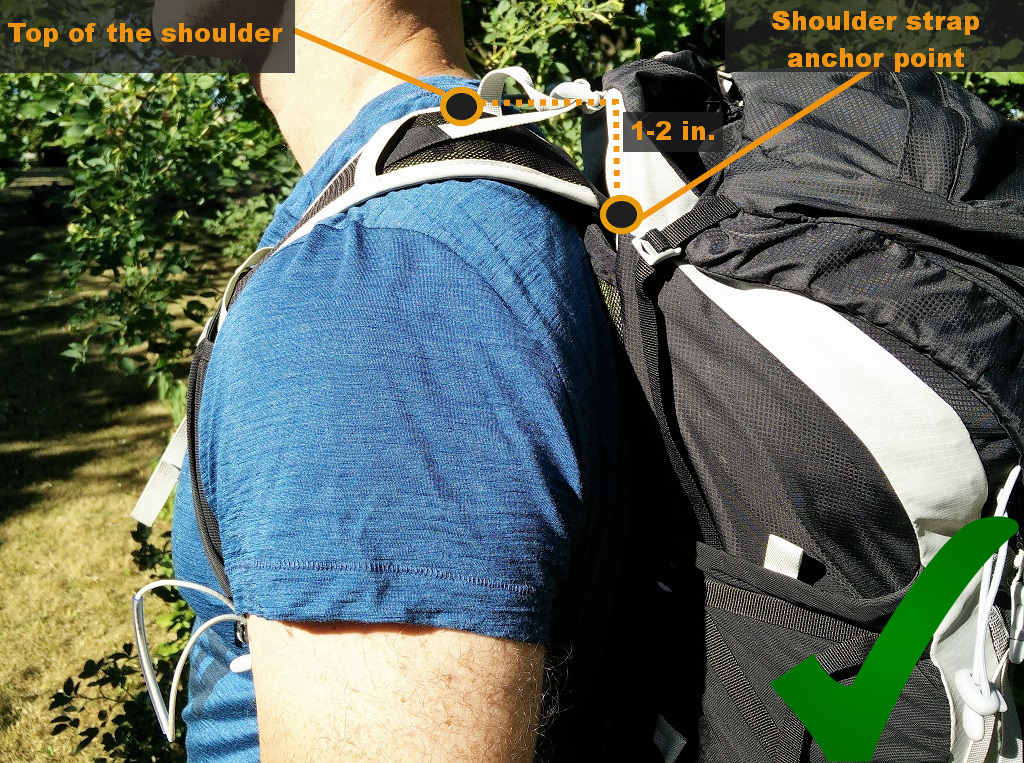
Shoulder Straps - Correct Position
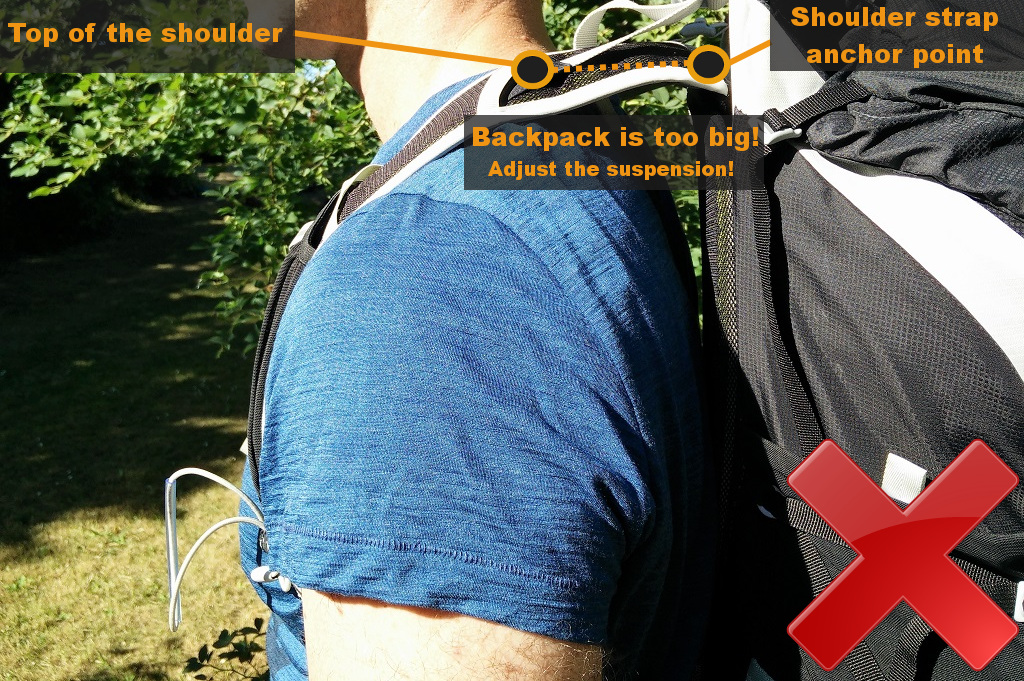
Shoulder Straps - Wrong Position
Adjust the load straps
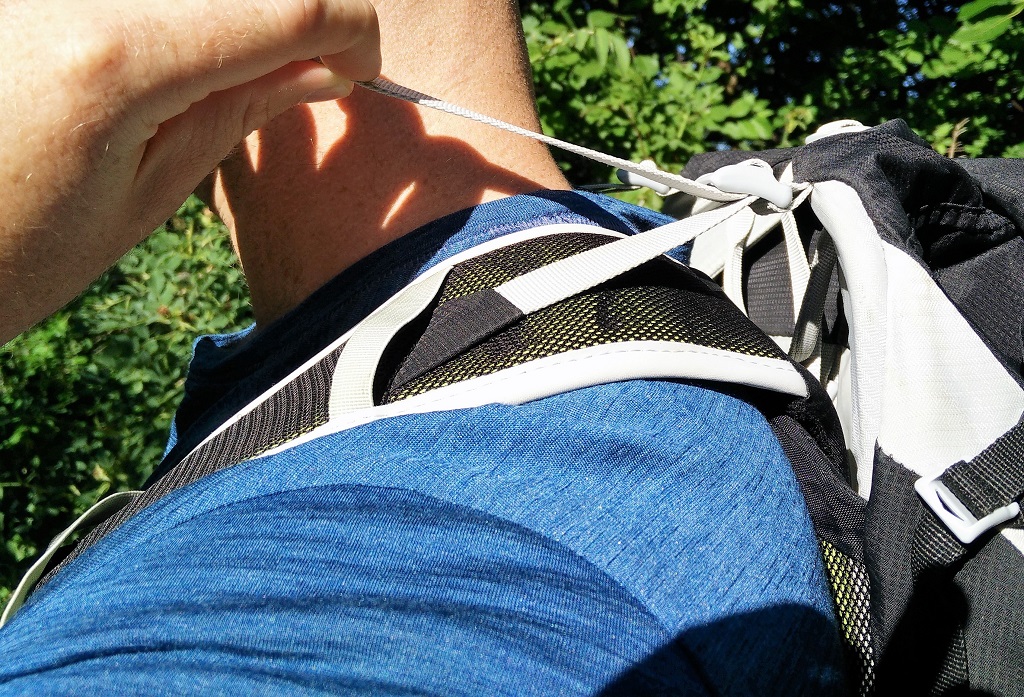
How to fit a backpack – Load straps in correct position
The load straps connect the top of the backpack with the shoulder straps and keep the backpack close to your body. It is essential that the backpack is close to your body because it will otherwise pull you backwards and interfere with your stability.
Pull the load straps down and forward to tighten them. The ideal angle of the load straps is around 45 degrees from backpack to the shoulder straps. However, the load strap angle varies a lot backpack to backpack and person to person and thus the most important thing is that the load strap is not too tight or too lose.
If you overtighten the load straps, the shoulder straps will start wrinkling. Therefore, it is crucial that you don’t overtighten the load straps. If the load straps are too loose, the backpack will fall too much backwards and thus interfere with your stability.
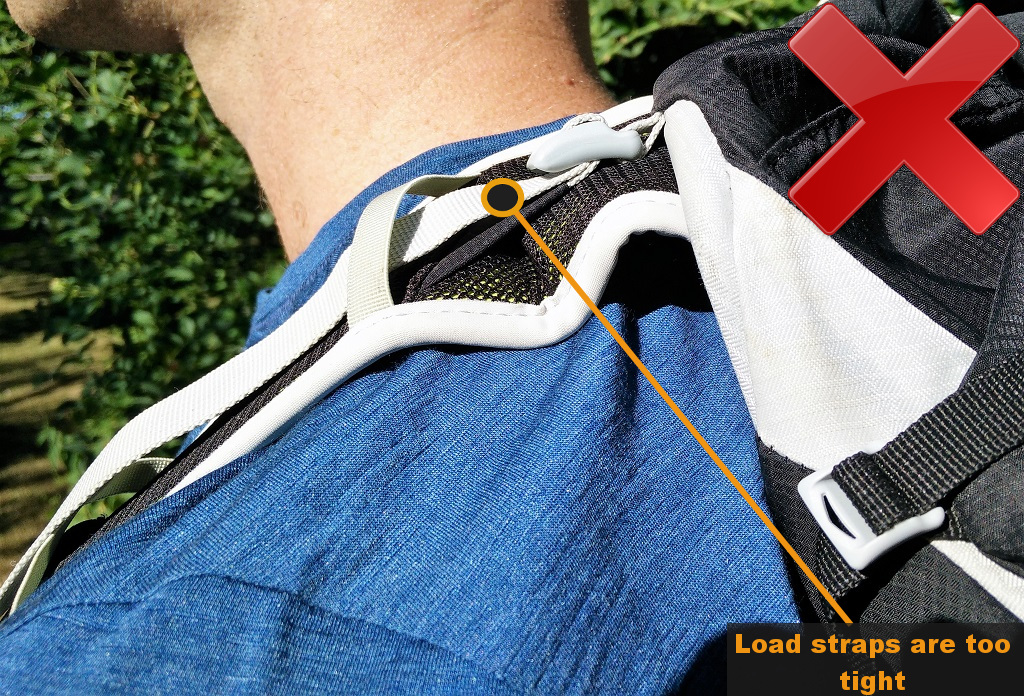
Load Straps - Too tight
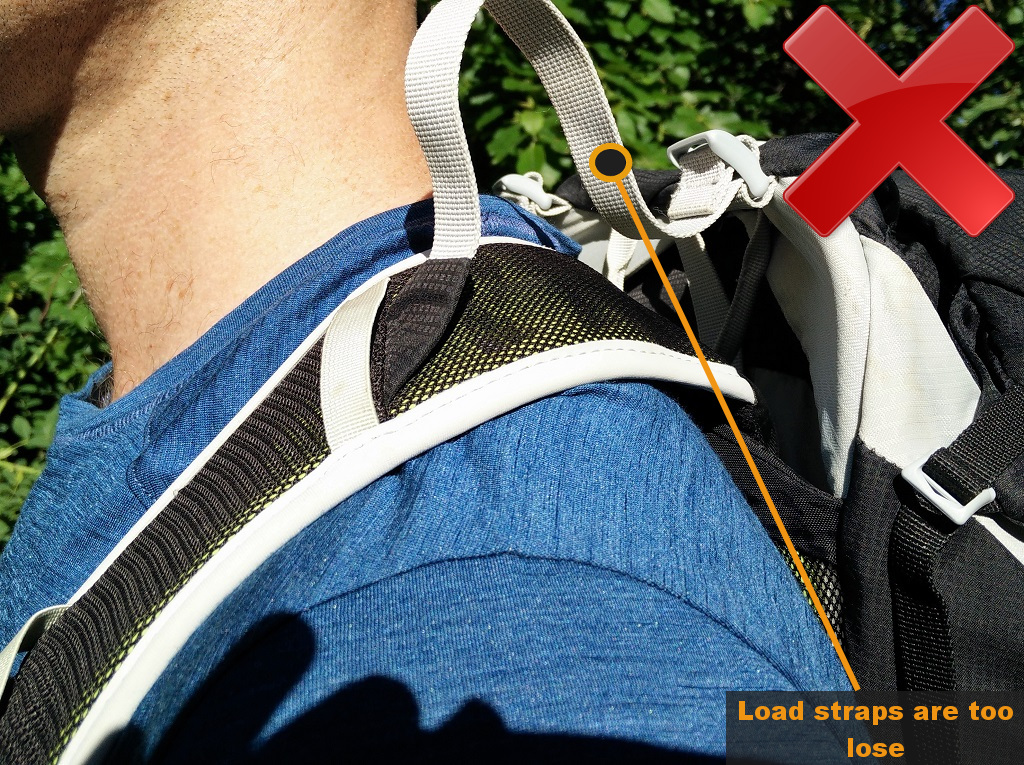
Load Straps - Too lose
Adjust the sternum strap
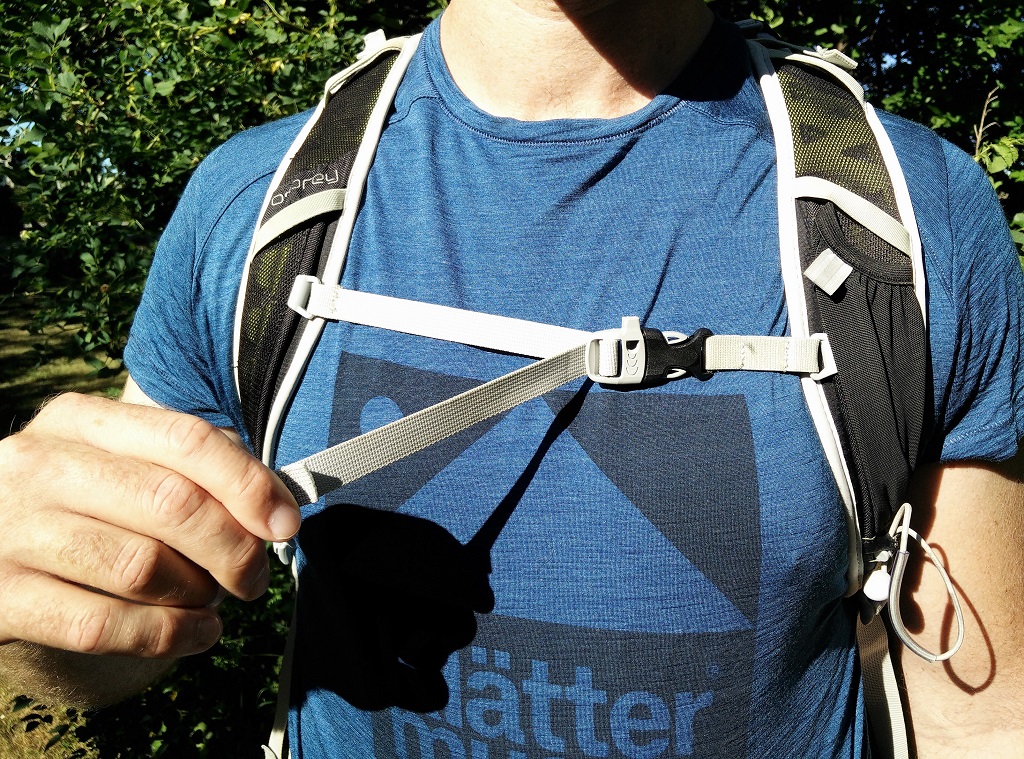
How to fit a backpack – Sternum Strap
The sternum strap keeps the shoulder straps in place while you are hiking so that they don’t move around on the top of your shoulders or slip off the edge of your shoulders.
First vertically adjust the sternum strap so that it sits approximately one to two inches below your shoulders. Then fasten the buckle and tighten it. Do not overtighten the sternum strap as an overtightened sternum strap will restrict your breathing and might cause chafing and other discomfort.
Sternum strap is not the most vital part of a backpack but it does increase the comfort to some extent when adjusted correctly.
Readjust on trail
After hiking for several miles, you will probably have to make small adjustments which usually include tightening the hip belt and the shoulder straps. If you’ll put on additional clothes or take some of your clothes off, you will also have to readjust the hip belt and the shoulder straps.
Besides fitting you well, your backpack should also be packed properly, meaning that it is not unstable, unorganized or too heavy. Learn how to properly pack your backpack in our article How to pack a backpack.
Do you have any additional advice on fitting a hiking backpack? Write it in the comments below.