How to pack a backpack?
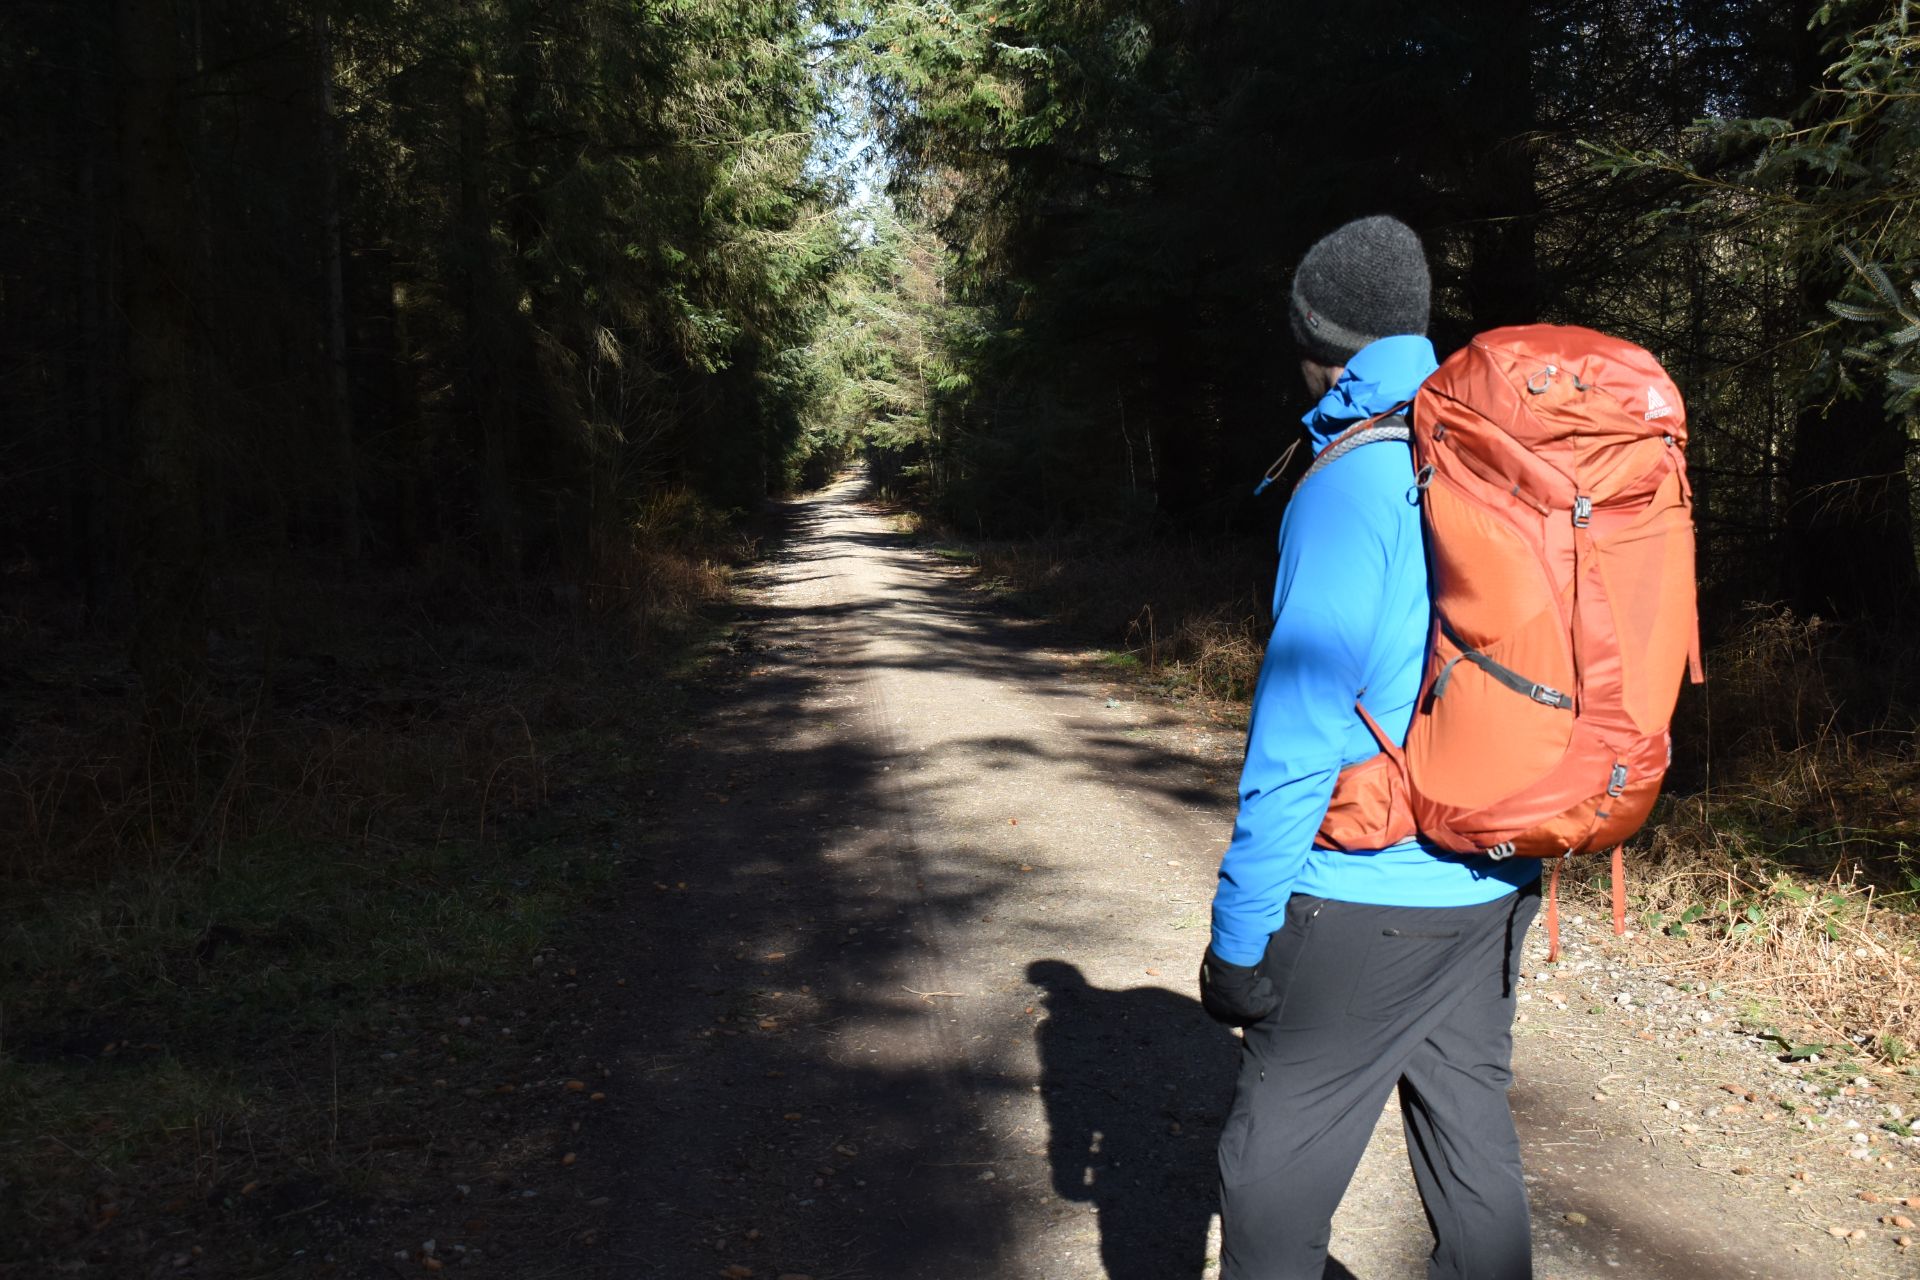
While it might be easy as cake to pack a backpack for a short hike where you carry only water and a snack, it becomes more of an art when you need to pack additional clothing, extra gear (climbing harness, helmet, via ferrata set etc.) or even sleeping equipment in case you plan to spend one or more nights out in the nature. A backpack should be packed efficiently so that it will not decrease your performance by being:
- Too heavy, so you spend too much energy carrying it.
- Unstable, decreasing your balance – which could be fatal on technically challenging terrain.
- Unorganized, so you waste time searching for things you need (GPS device, headlamp, map etc.) – which is in best case annoying, but can be serious if you for example need to navigate quickly before a storm, heavy fog, darkness etc.
In this article we will explain how heavy a backpack you should/could carry, how to ensure it is as stable as possible and how to organize items in it.
If you don’t have a high-quality backpack yet, check out our selections of Best Hiking Daypacks and Best Expedition Backpacks.
Table of contents:
- How heavy a backpack should you carry?
- Stability of a backpack and center of gravity
- Organizing items in a backpack
How heavy a backpack should you carry?
When packing a backpack it’s important to keep track of the items (and their weight) which you put in so that the backpack doesn’t become too heavy for you. The rule of thumb is to carry a backpack lighter than a third of your body weight. This means that a hiker who weighs 80 kilograms should optimally not carry more than 26 kilograms on the back (remember to include the weight of the backpack itself, which is typically between one and two kilograms for a quality backpack depending on its size). However, this rule is very general as your ability to carry a more or less heavy backpack also depends on the terrain (steepness) ahead of you and your fitness. Newer hiking literature states that a backpack is not too heavy as long as the rate of the climb is limited by legs and not by breathing (heart rate) – which in plain terms means that you should ascend a slope with a speed determined by the (lack of) power in your legs rather than you being out of breath from carrying the backpack. This rule is somewhat more useful as it takes physical preparedness into account.
If you are often struggling with packing your backpack too heavy, keep in mind that the weight can often be reduced by replacing certain items with high-quality versions that are usually lighter (especially true for sleeping equipment). Needless to say, unnecessary objects should be weeded out. Sufficient water and food are of course indispensable, but especially the weight of the latter can be reduced significantly if you make some smart choices in what you bring – check out the article How to choose food for a hiking trip. If you are unsure about the needed quantity of water for a hike, please read the article How much water to take on a hiking trip.
Stability of a backpack and center of gravity
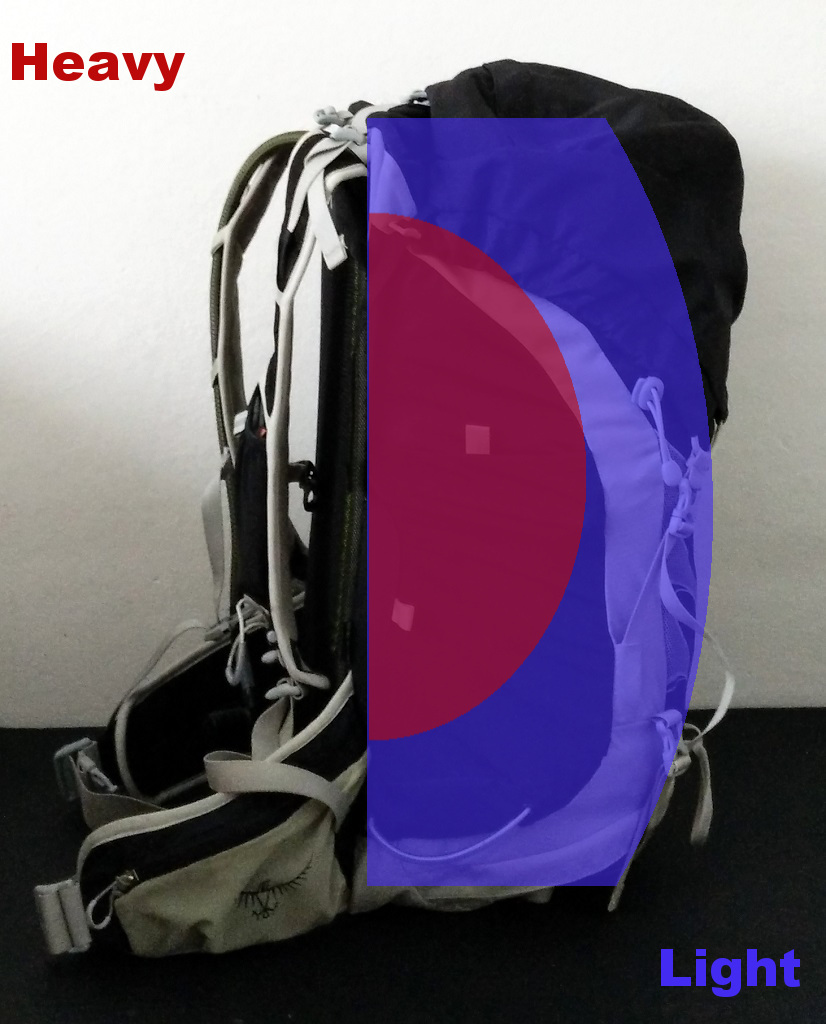
Backpack Weight Distribution
The center of gravity of the human body is a point around which the combined mass of the body is concentrated. Men normally have center of gravity around the sternum while women have it in the center of their pelvis. Backpacks affect center of gravity – the heavier the backpack, the more the person’s center of gravity changes. If a heavy backpack changes your center of gravity significantly, it means that you have to change your posture to mitigate this change – for example to lean more forward if the backpack pulls you backwards. This results in discomfort and unnatural movement.
However, by distributing the weight in a backpack correctly the influence on your center of gravity can be reduced and the stability of the backpack increased:
- Place heavy items (water, food) against the backpack’s backpanel so that they don’t pull you backwards
- Center the weight in order to prevent the backpack from tilting to left or right (counter balance the weight)
- Do not place heavy items at the top (above shoulders) as they could put you off the balance when bending sideways, backwards or forward – which could be hazardous while hiking on technically difficult terrain.
- Fasten the backpack’s compression straps in order to pull the backpack’s contents as close to your back as possible
Additionally, you also shouldn’t use a backpack that is too big for the gear which you are carrying. If a backpack is too big you will have problems stabilizing items in it – for example when you will bend forward the items will slide to the top of the backpack. If the items are light this is not a big deal, but when carrying heavy items the force could pull you down or sideways.
You should also adjust your backpack so that it fits you well. Learn how to fit a backpack in our article How to fit a backpack.
Organizing items in a backpack
You backpack should be well-organized so that you can easily find what you need. It of course helps if the backpack is designed smartly with spacious and appropriately placed compartments, pockets, access points (top-loading, zippered front panel) etc., but every backpack can be well-organized with a little effort.
When packing you should follow these basic principles in order to have a well-organized backpack:
- Often used items should be within easy reach (hip belt pockets, side pockets, top lid pocket)
- Seldom used items should be packed in the main compartment at the top
- Rarely used items should be packed in the main compartment at the bottom
The image below shows a sample of a well-organized (Osprey Talon 44) backpack.
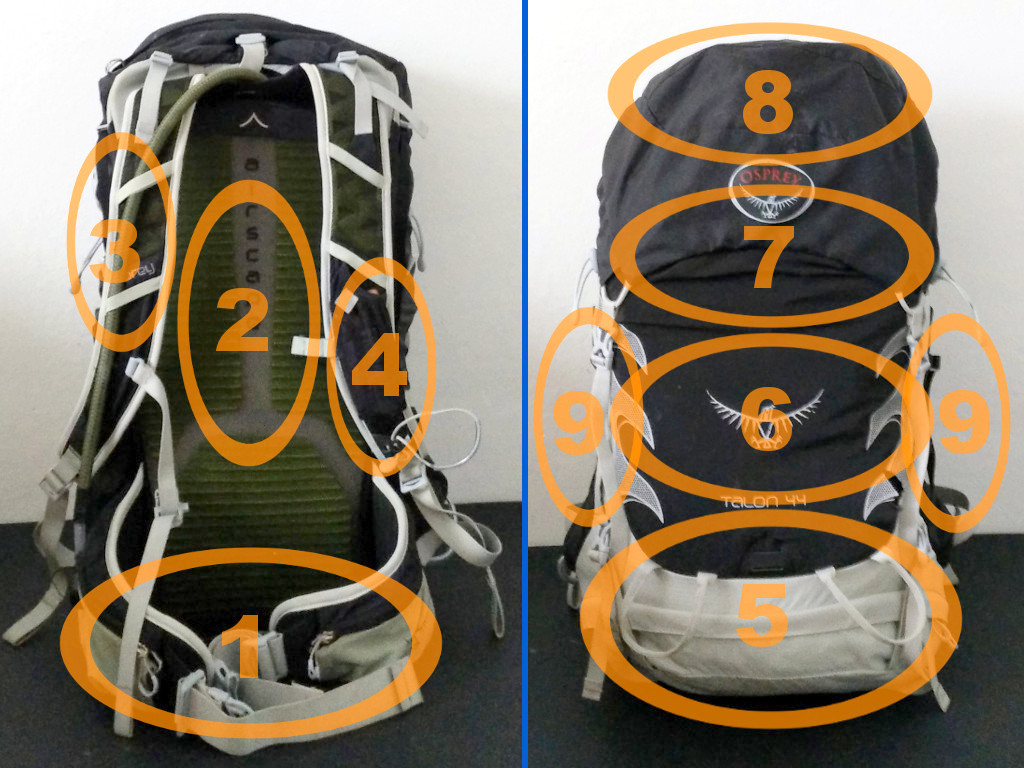
Organizing items in a backpack
- Cell phone, camera, lip balm, sun cream
- Hydration bladder is placed in the sleeve between the main compartment and the backpanel
- Hydration bladder’s tube is attached to the shoulder strap so that it stays in place
- PowerBar is stored in shoulder strap pocket so that it’s within easy reach
- Sleeping equipment: tent, sleeping bag and inflatable sleeping pad are stored at the bottom of the main compartment as they won’t be used till the camp is reached
- Additional clothing/equipment: fleece jacket, rain jacket, climbing harness etc.
- Food, packed in a plastic bag so that it can be quickly removed from the backpack if additional clothing or equipment is needed
- Top lid pocket: Gloves, hat, headlamp, sunglasses, toilet paper and other often used accessories
- Side pockets can be used for storing water bottles (if you don’t use a hydration bladder) or accessories that need to be within easy reach (GPS device, compass, map etc.)
Additional advice:
- Pack your gear into a few stuff sacks or plastic bags. This does not only keep your gear dry in case of rain but it also allows you to easily find what you need (as long as you remember what you packed in which bag).
- If you are not using a hydration system, store water bottles in the side pockets so that they are within reach. Additional water bottles should be stored in the main compartment against the backpanel for better stability. For more information about hydration systems and water bottles, read Hydration Systems VS Water Bottles.
- If you are using a closed-cell foam sleeping pad (which is usually bigger than inflatable sleeping pads) you can put it between the lid and the top opening of the backpack. However, some find this option slightly clumsy as the sleeping pad has to be removed every time when you need take out something from the main compartment. Alternatively, you can attach it with straps to the bottom of the backpack.
- Trekking poles can also be attached with compression straps to the side of the backpack
- If you are using a minimalistic backpack that doesn’t offer many pockets, use bags to divide items. For example in one bag pack sun cream, lip balm and toiletries and in the other additional clothing. This will allow you to quickly find items that you need.
I’d love to hear your thoughts on how to pack a backpack. Write them in the comments below.